Installing Windows after Linux. Installing Ubuntu from Windows - Wubi, good or bad? Disk partitioning in Windows
Have you thought about switching from Windows to Linux? Surely this thought comes to many people, because Microsoft is not pursuing the best policy right now, while Linux distributions, and free software in general, are gaining popularity. A rough transition can lead to a lot of problems, so the most popular advice for beginners is “Install the distribution as a second system next to Windows.” And due to the fact that one of the most popular Linux distributions is Ubuntu, today I will talk about how to install Ubuntu next to Windows 7.
Ubuntu next to Windows 7: dualboot
Dualboot translated from English means “dual boot”. This means that you will be able to boot into both Ubuntu and Windows. This approach is good because you don’t have to go through the hassle of searching for a particular software package. It will be enough to just boot from Windows, where everything will remain as before.
Before we begin the installation, we will need to prepare a Windows hard drive.
Preparing a hard drive in Windows
To prepare free space for installing Ubuntu next to Windows 7, we need to right-click on the “Computer” shortcut, and then go to “Management”.
In the window that opens, we need to find the “Disk Management” item and go to it:

Now, by right-clicking on the disk from the context menu, we go to the “Shrink Volume” item. Basically, according to the standard, you will have two partitions here: the system partition (C) and the file partition (D). It is best to “bite off” space from the partition with files, leaving the Windows system partition alone.

For Ubuntu to work comfortably, we need about 80GB of free space (for several disks, I’ll tell you about this later). If you have more space available, for example 100 or 120GB, then you can measure out that much. It won't be redundant.

As you can see, after this operation the “Free space” field appears in the window; this is the space we will use to install Ubuntu. Naturally, you should have somewhere around 80-100GB, but I (in the screenshot) have 2GB as an example.
Burning an image on Ubuntu to installation media (USB)
It is best to use Rufus or Etcher for these purposes. You can download them from official websites, and what’s good is that their interface is quite simple (especially the last one). However, I described this process in the article. You can also familiarize yourself with it.
After you burn the image, leave the flash drive in the slot and reboot the computer.
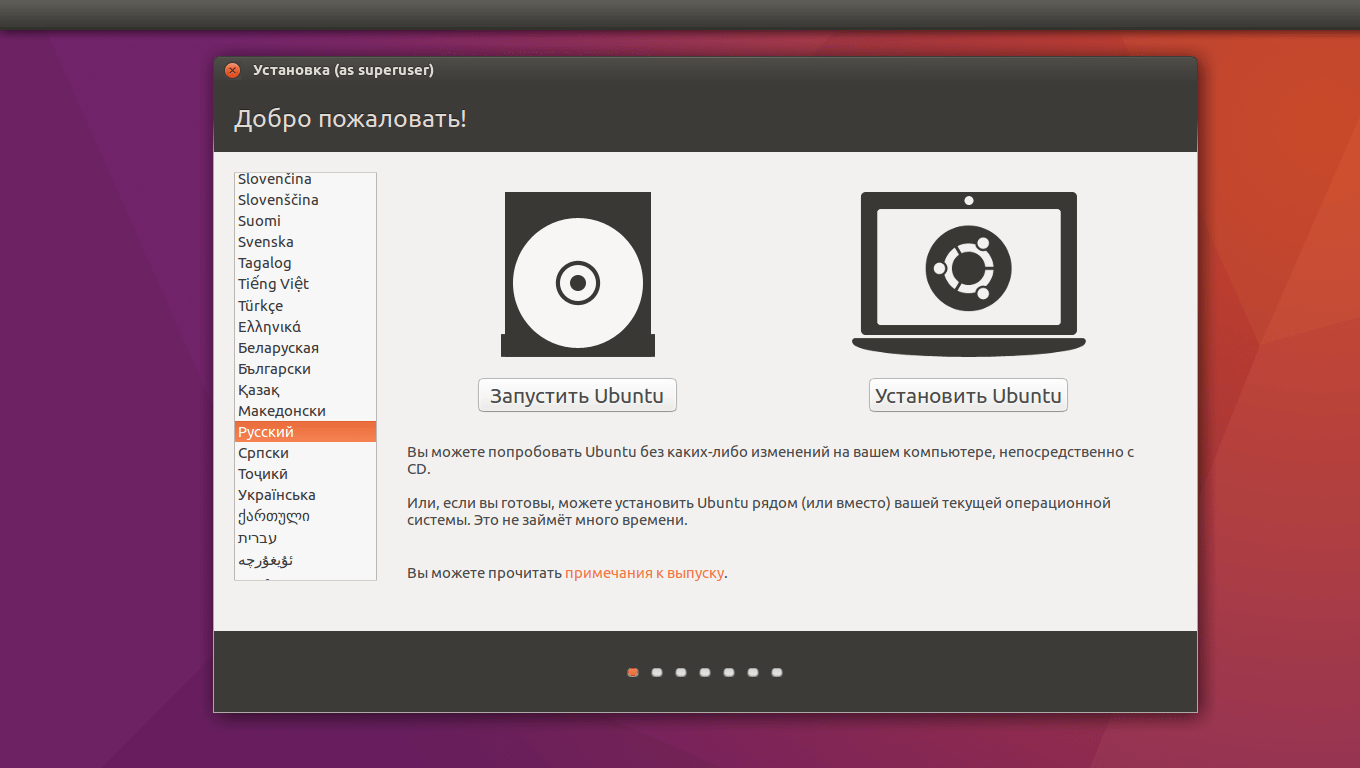
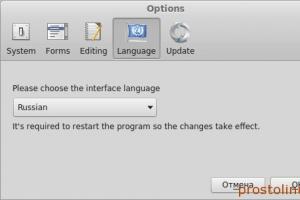
Now we must install the system itself. Select the desired language in the left list, and then proceed to install the system.

Don't forget to check these two boxes (updates and third-party software), because in most cases this can be useful.
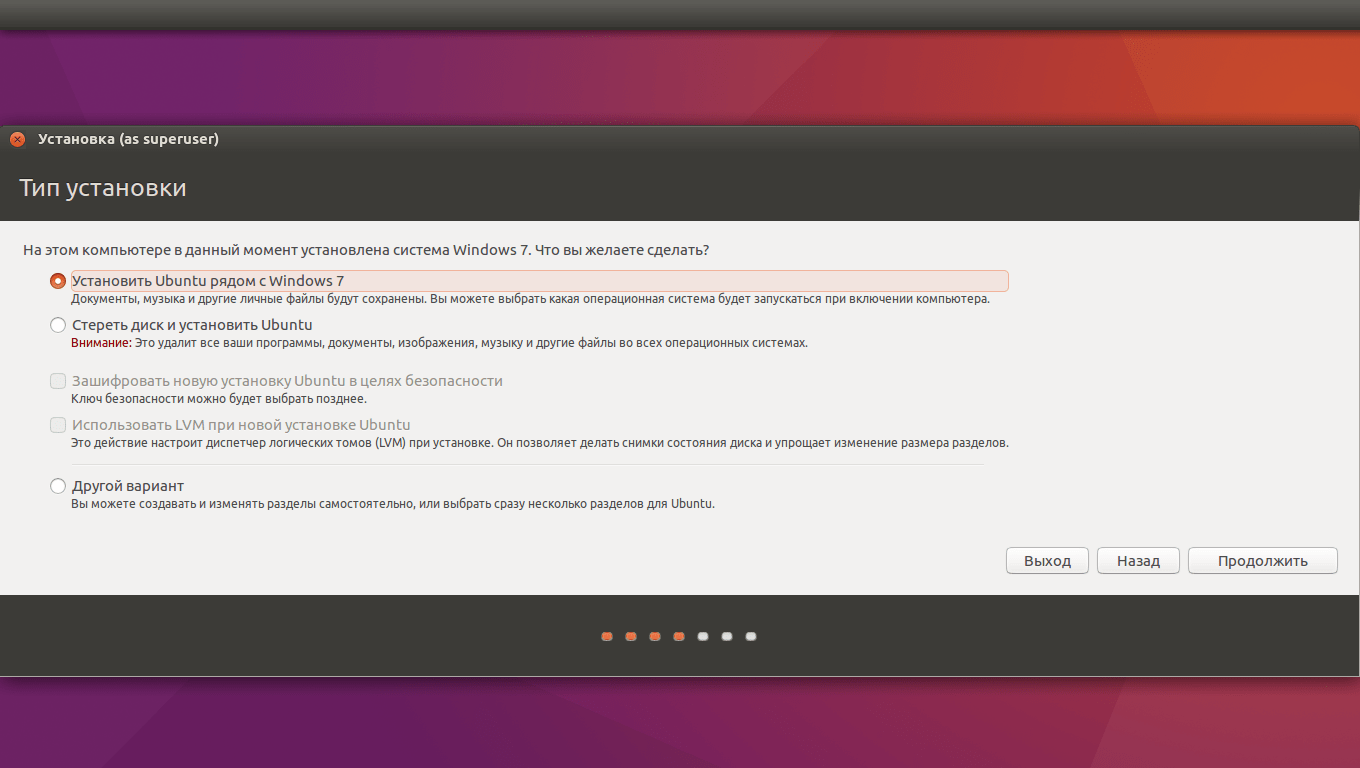
We need to choose the optimal installation type. You can choose the “Install Ubuntu next to Windows 7” option, which should allocate free space automatically. I’ll take a closer look at manual disk partitioning.
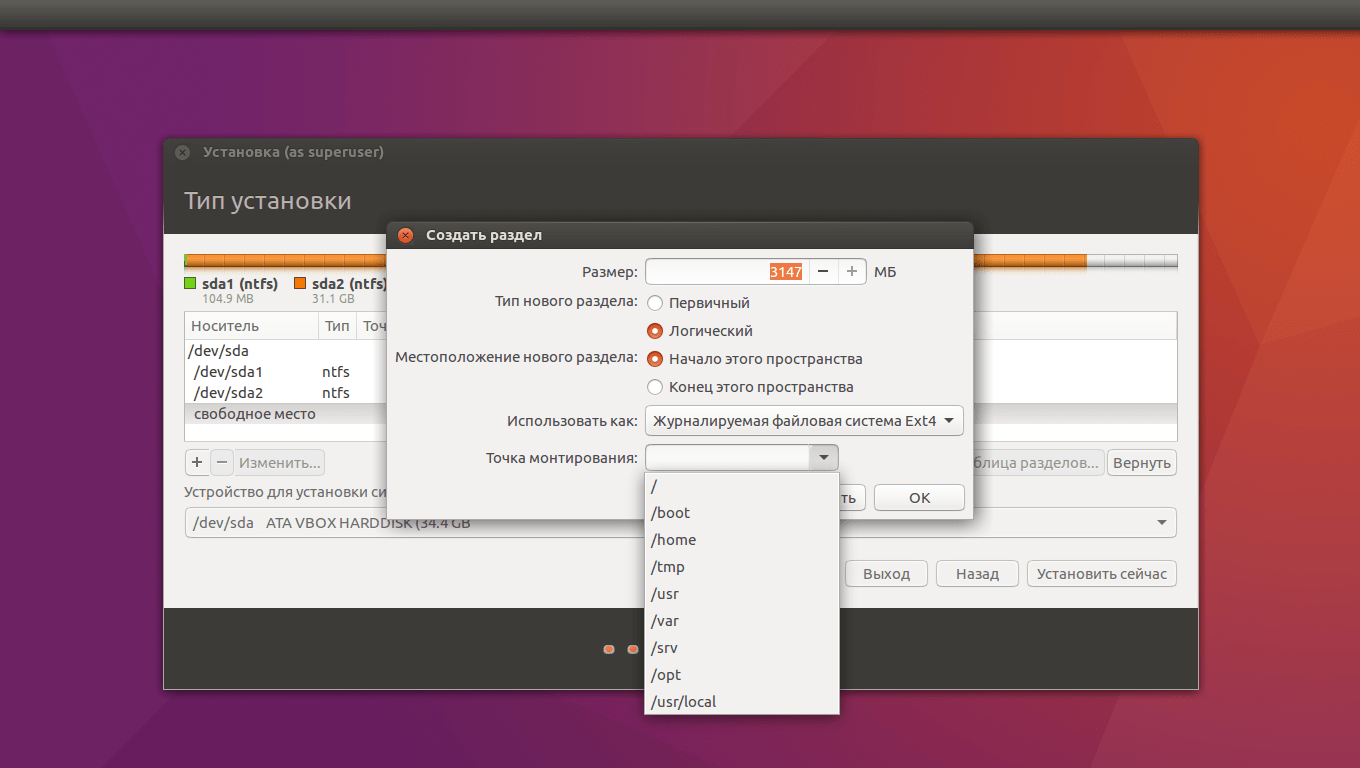
So, select free space and click the plus sign on the left side. A window like this will pop up, and with its help you need to create the following sections:
- System partition: size 20000MB, partition type: logical, partition location: start..., use as: Ext4 (leave as is), mount point - “/”.
- Swap partition: size 4000-5000MB, use as: swap partition. Section location: end of this space, leave the rest as it was.
- Home partition: give it the remaining free space, use it as: Ext4 (as in the first case), mount point - “/home”, partition location: the beginning of this space.
After marking, click “Install now”, confirm the changes, and proceed to selecting the location.

By clicking on the map or the field below, we find our city (or the one closest to us) and click “Continue”.

Also here we select the keyboard layout. We look for the one we need in the list, and then click “Continue”.
This article will help you install any Linux distribution from a Windows machine directly from an iso image on your hard drive. The article may help owners of netbooks, as well as those who, for some reason, cannot use a regular installation disk.
Installing Grub4Dos
For starters, Grub4Dos. At the time of writing, the latest stable version was Grub4Dos 0.4.4Windows XP/2000
- Unpacking grldr And menu.lst
- Editing boot.ini. You may need to remove the “read only” attribute to be able to save the file
attrib -r boot.ini - Add to the end of the file
C:\grldr="Grub4Dos"
Windows Vista/7
- Unpacking grldr, grldr.mbr And menu.lst from the archive to the root of the disk with Windows installed.
- Launch the console as administrator and execute
bcdedit /create /d "Grub4Dos" /application bootsector - In response to the previous command, we will receive the id of the created record, which we will substitute in the next three
bcdedit /set (id) device partition=C: bcdedit /set (id) path \grldr.mbr bcdedit /displayorder (id) /addlast
Editing menu.lst
Adding a new item to the bootloader menuTitle Boot Installer fallback 1 root (hd0,1) kernel /vmlinuz vga=normal ramdisk_size=14972 root=/dev/rd/0 rw -- initrd /initrd.gz
Here we substitute the disk number and partition number with yours. If you install Ubuntu, you can download (amd64) the necessary images vmlinuz And initrd.gz. In other cases, they can be found in the iso image of the distribution itself. For reference, here is a small table of names in different distributions
| Ubuntu | vmlinuz | initrd.gz |
| Debian | vmlinuz | initrd.gz |
| Fedora | vmlinuz | initrd.img |
| Mandriva | vmlinuz | all.rdz |
| openSUSE | linux | initrd |
| Slackware | bzImage | initrd.img |
| Gentoo | gentoo | gentoo.igz |
Now we copy the iso image of the distribution kit into the resulting heap and reboot.
Installation
The installation may vary slightly between distributions. I'll look at installation using Ubuntu as an example.After the reboot, a new item will appear in the Download Manager. Choose
The Grub4Dos boot loader will appear. Select “Boot Installer”
The installer will prompt you to select a language. We choose our great and mighty
The installer may not be able to find the image on its own
In this case, you need to restart the search from the main menu and specify the location manually
After selecting the image, several more familiar windows will appear and the installation will begin.
Editing menu.lst. Option #2
An alternative option menu.lst is also possibleTitle Boot Installer fallback 1 find --set-root /image_name.iso map /image_name.iso (0xff) || map --mem /image_name.iso (0xff) map --hook chainloader (0xff) savedefault --wait=2
No additional actions are required here - the usual Ubuntu installer will load.
Since the image is loaded from the hard drive, I advise you to pre-allocate a partition for the OS and swap before starting the installation.
Not long ago, a new version of the now popular Linux distribution, Ubuntu 18.04, was released. This release brought quite a lot to the open source community. You could say he set a new bar for the entire community. Beginners, however, do not really delve into all these subtleties. To get a good start, they need to know exactly what to do in a given situation. Of course, in this case, you need to start with installation. Due to the fact that the most practical and painless is a gradual transition from one operating system to another using dual boot (the presence of several operating systems on a PC with the ability to use both in turn), today we will look at installing Ubuntu 18.04 next to Windows. As an example, we will take the above version of Ubuntu and Windows 10. So, let's go.
Preparing for installation
Downloading the Ubuntu image from the official website
First, we need to download the image of the distribution to be installed. To do this, we go to the official Ubuntu download page, where we then select Ubuntu Desktop (version for home computers).
Boot partition (with UEFI):
- Size: 1-2GB
- New partition type: Primary
- Use as: FAT32 file system
- Mount point: /boot/efi
Boot partition (non-UEFI):
- Size: 1-2GB
- New partition type: Primary
- New section location: Start of this space
- Use as: Ext2 file system
- Mount point: /boot
System partition:
- Size: 20-30GB
- New section location: Start of this space
- Mount point: /
Home section:
- Size: leftovers
- New partition type: Logical
- New section location: Start of this space
- Use as: Ext4 Journaled File System
- Mount point: /home
Basically, that's it. This is roughly what manual disk partitioning looks like when installing Ubuntu. After all the manipulations, we move on to the installation itself.
Location Settings

In this window we select our location (to set the time zone). Using the map, you can select your city or the city closest to you.
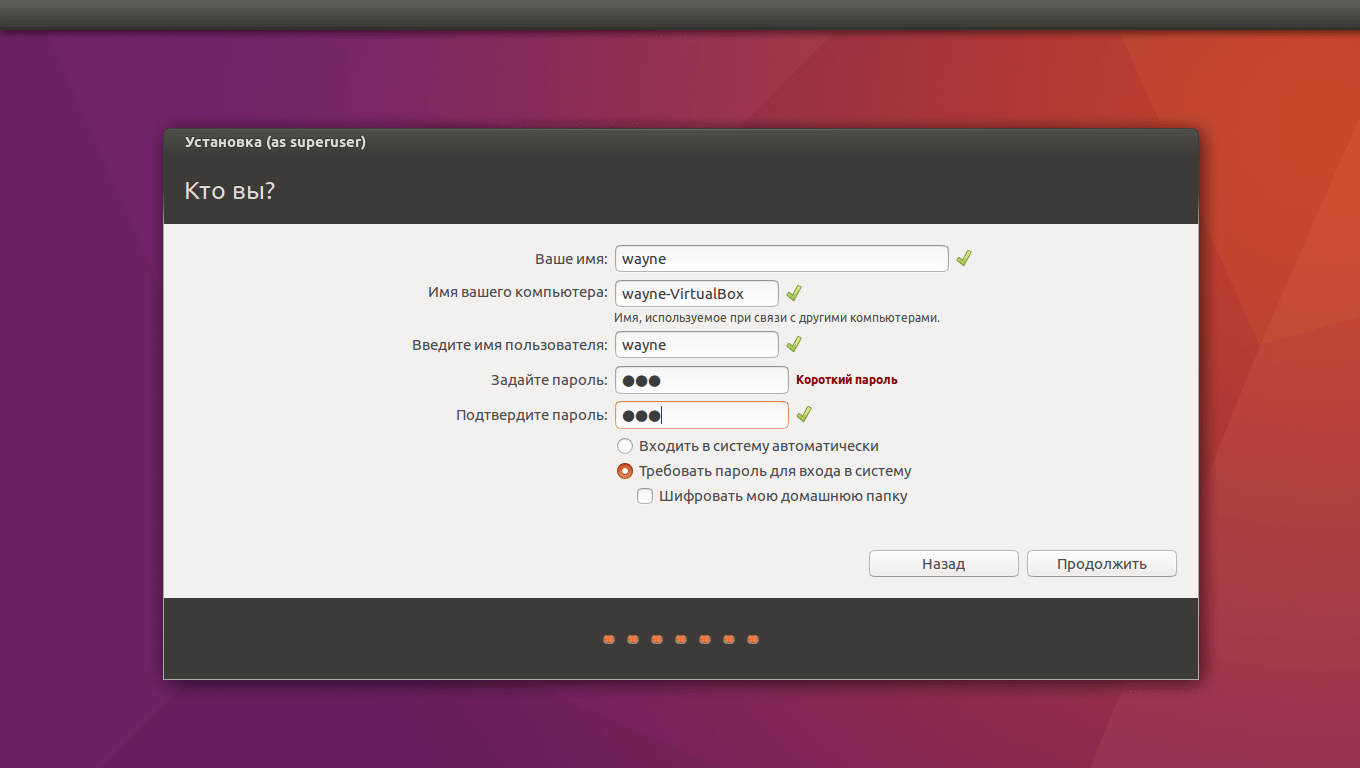
User setup

Just enter your name or any other word in the top field. All this stuff will be copied into two fields below (a postfix will be added in the third), you can change the data in these fields if you want. We also set a password for logging into the system, and at the same time we choose whether we want the login to be carried out automatically, without asking for a password.
After setting up and filling out all the fields, click “Continue”. The installation of the system will begin.

Completing the installation

Immediately after the installation is complete, the system will prompt us to reboot to start using Ubuntu 18.04. Due to the fact that we installed Ubuntu next to Windows, after rebooting we will see a Grub window that will look something like this:

Using the menu, we can choose which operating system the computer will boot into. Here we can select other launch options.
Select Ubuntu 18.04 and wait for the system to boot.
Setting up Ubuntu 18.04 after installation

After logging in, we will be greeted by this window. Before we start using the system, we can familiarize ourselves with the contents of this small utility (something like a tour of the changes in the new version of Ubuntu with long-term support). With its help, we can change some very important parameters, such as Livepatch - updating the Linux kernel without rebooting the operating system (more details).
Here you will be asked if you want to send anonymous information about the operation of the system to Canonical (this will help improve the distribution), and at the end they will “bring you up to date” by providing information about the applications pre-installed on the system.

Checking for available updates

And although we already downloaded updates at the beginning of the installation (or maybe you missed this point), we should definitely check for current updates using the utility of the same name: “Application Update”. We can also do this using the console command:
Sudo apt update && sudo apt upgrade
Minimize applications like in Windows
 .
.
Surely you will like this feature. It allows you to minimize all applications to the taskbar by clicking on the icon on this very panel. Windows behavior, but very convenient. To enable this feature, open a terminal and type the following into it:
Gsettings set org.gnome.shell.extensions.dash-to-dock click-action "minimize"
Activate hidden options with Tweaks

There are several very useful features that are not available by default. To activate them in the system you will need the appropriate utility. It's called Tweaks, and you can install it using this link.
Well, that's all. Have a good day:).
Linux and Windows are operating systems that are radically different from each other. But the process of installing them together is not that complicated.
- If you're partial to the Linux operating system and want to get started with it, but perhaps don't want to miss out on the Windows you already have installed.
- If you are afraid of any kind of failures and have a backup option on hand.
- Or you just don’t want to lose your favorite photos, games and programs.
Then we will tell you about such a great option as installing Linux and Windows on one computer!
This article will discuss installing Linux on Windows 10.
Why in the tenth version? It's simple, because this is the newest version of this operating system. But don't worry, this guide will work for Windows 7, Windows 8 and Windows 8.1 versions too.
General view of the object of the article
You can install it in two ways: without partitioning the disk and by dividing categories into parts.
The first way to do this is faster, but the second is much more efficient, because while you are installing one partition, the others will not be used.
First, we will briefly talk about installing the entire operating system.
Option No. 1. Installing Linux on Windows 10
Windows 10 version 1607 introduced a new shell, Ubuntu Bash. It allows you to use bash scripts in the OS, run and install Linux programs. And in version 1709, three installation software are already available.
With the release of version 1709, the Linux installation for Windows was greatly modified.
Instructions for step-by-step installation in new versions:
1. Go to Control Panel - Programs and Features - Turn Windows components on or off, turn on Windows Subsystem for Linux

2. After installation and restarting the device, download one of the applications.

3. Launch the downloaded software and set a username and password.

4. To enable the Windows Subsystem for Linux component, use the command:
Enable-WindowsOptionalFeature -Online -FeatureName Microsoft-Windows-Subsystem-Linux
Installation instructions:
1. Launch OS settings - Update and security - For developers. Enable developer mode.

2. Open Control Panel - Programs and Features - Turn Windows features on or off and select Windows Subsystem for Linux.

3. After installation, write “bash” in the OS search, run this version and install.

4. After installation, launch the shell.

Examples of using Ubuntu Shell on Windows
Bash Linux programs on Windows 10 can be installed, destroyed and modified via apt-get from the Ubuntu repository.

Also, you can install Git in Bash and use it as usual, because its interface is no different from Ubuntu.

bash scripts
You can create and run bash scripts on Windows 10 using the Nano Storage Editor.

Attention!
This instruction will only be relevant for versions of Windows 10 1607 and 1709. If you have a different version, proceed to the second installation method.
Option No. 2
To install the two operating systems described above together, you will need to create additional disk partitions, the minimum number of which should be three.
While Windows can be installed on one partition, it is not customary to do this with Linux, but this option is not excluded.
It’s just that this system is very flexible and therefore its installation is allowed in several places where the system itself, its settings and parameters, and the user files themselves will be located.
During the reinstallation, this will work to your advantage, because while you are installing the system partition, the remaining two will be untouched.
These partitions can be roughly called the system home partition and the swap partition. Let's take a closer look at each of them:
- The most minimal free space requests for a system size installation range between 7 and 20 Gigabytes. But this is the bare minimum, which is only necessary for the installation itself and some supporting applications. It will be more thoughtful if you free up another 15-20 Gigabytes for installing the programs and applications you need. Typically, 35-45 GB are allocated for such a partition.
- The swap point comes into play when the system needs additional RAM.
Data that is not used or is rarely used is sent to this section. In terms of capacity, it should occupy exactly half of the volume of the operating device. But when using sleep or power saving mode, this partition must be the same as the system one.
- The home partition contains only files and programs for your personal purpose: these are still the same images, documents, games, music, programs, etc. Everyone sets the volume of this disk individually, based on personal preferences.
Preparing a Windows Disk
Before installing these two operating systems together, be sure to create a backup copy of the entire existing structure or selectively, only the necessary documents, in the event that part of the space will be separated from the media.
No, nothing will be erased, these are just precautionary measures in case of some error, system problems, inattention and a number of other factors.
But it will be best if you still create a copy of not only your necessary files, but the entire operating system if you want to interact with the system media.
To do this, open the item in the control panel that corresponds to the procedure.
If you copy another drive, D, E, etc., then it will be enough to create a copy of only the necessary files.
After the backup process is completed, we can move on to the actual Linux installation process.
To do this, we will use the Windows add-on – Disk Management. Click on the shortcut "My computer" and select the column "Control" .
After opening this menu, we search for and select the item.
We will be shown those disk volumes that are available on the computer: system and regular (in this case there is only one).
For example, we will take drive D, but for the system drive all actions are similar. So how do you manage disk size?
To begin, by right-clicking on the selected drive, click "Shrink Volume" .
After opening a small additional window, in the column "Size of compressible space" specify the size of the volume you will create.
Advice:
Before you do this, look at how much real free space you have on your disk and whether you are investing in your calculations. After all, you will not be able to tear off a non-existent piece of the pie. If there is not enough space, it needs to be freed, and only then begin compression.
So, after applying the size of the compressed space, we confirm our choice and click "Compress" .
Then the unallocated space will be displayed on the screen, with which we will work further and create the necessary partitions.
The pre-installation stage is complete and now you have free space to install Linux with Windows 10.
We will not perform disk partitioning on this system, but will do it using Linux tools.
Preparing a Disk in Linux
Here we will talk about the second alternative way to segment a disk without using Windows. This is not a complete guide to installing Linux on Windows 10.
If you have reasons or you simply do not want to do this using the standard method, then you have the opportunity to do this using any Linux program with the Gparted disk management utility previously installed.
Let's take the well-known Ubuntu as an example.

Launch the work from the Ubuntu media and in the Dash search type "Gparted"(Fig. 19).
Go into it and you will see a special window for the process of monitoring and coordinating media in Linux.
It is very important to note that everything works differently in Linux than in Windows.
Here, the partitions on the media and the media themselves are called differently; more precisely, these are simply the paths for finding documents in the dev virtual file system.
Soon you will get used to it and figure it out. And at this point in time we will only say that the name of a separate partition will begin with “/dev/sd”, and then there will be a letter that characterizes the name of the media, and a number indicating the partition number (for example, sda1, sdb2, etc.) .
In addition to the name of the media partition, in the application we will see the dimensions, the file complex and the amount of free space on the media, with the help of which we will understand where the system is located.
In this model, the path dev/sdb1 is a kind of similarity to the C drive in Windows, and dev/sdb2, accordingly, is the D drive.
So, we reduce the size of the dev/sdb2 partition to 10 Gigabytes in order to install Linux on Windows 10 in the space that was freed up. To do this, select a section, right-click on it and go to Resize/Move.
In the window that pops up after this operation, in the New size column we enter the size we require, and this is also done using the slider.
After fulfilling the previous condition for executing the instruction, we click on Resize/Move. Figure 23 shows that no special modifications are visible yet, but free space has appeared, as we wanted.
The procedure for modifying the volume of the file complex takes the designated time.
When the operation is completed, you can look and make sure that there are noticeable decreases in the dev/sdb2 category and free space has appeared.
To do the same with the system area, make similar settings.
You can reduce the size of the area and subsequently add free zones, but do not do it as shown in Fig. 27:
In view of this kind of action, you can damage the Windows bootloader and although restoring it will not be difficult, it will take you a lot of time, which, we are sure, is of no use to you.
It is best to create partitions in Linux using a special application during the installation process.
Installing Linux with Windows 10
Here we will discuss some facets of disk layout using Ubuntu software as an example, but for others the situation will be similar.
In order to better understand and understand how to install the system, we will consider the manual installation option.
At this stage, we create the previously agreed upon partitions from the space that we have freed up. With the intention of selecting a mount point for the system partition, we address the path /, for the swap area we do not set the mount path, and for the home partition we designate it as /home.
To ensure a successful installation of Linux with Windows, carefully follow the instructions of the software you are using.
Installing Linux with Windows 10 UEFI
UEFI- this is a modern technique that has replaced the old and outdated BIOS, which is used on all current laptops.
Initially, you can notice the use of a new GPT partition table, which has come to replace the old MBR and create a separate partition for operating system bootloaders.
If you have any doubts that UEFI will make installing Linux with Windows 10 on a laptop more problematic, then cast these doubts aside, because there is nothing tricky about it.
If you already have Windows, then it is more likely that this technology is already present and it is recommended that you just select it to install the bootloader during media partitioning. It is small in size (about 30 Megabytes) and is designated by the fat32 file system.
During the installation of Linux with Windows 10, we address this partition and the mount point for it: /boot/EFI. All software that works with the Grub2 boot loader supports installation in UEFI.
That’s all the secrets of installing in UEFI, now you have the right to install this operating system not only on your computer, but also on your laptop, the main thing is to follow the installation instructions.
Completing the installation
Perhaps you have one more question left, should you switch to Windows?
There is no need to worry about this, because on the eve of each computer boot, the Grub boot loader will automatically find the Windows boot loader and ask you which operating system you would like to work on.

That is, it turns out that dual booting Windows 10 and Linux will be done automatically.
But! If some malfunctions occurred in the computer and the bootloader could not determine it itself, then you can configure everything yourself and if everything is done correctly, then you will certainly have access to Windows after installing Linux.
Possible problems after installing Ubuntu
In this section, we will look at problems that are likely and not excluded after installing Ubuntu.
If Ubuntu boots immediately when turned on or after a restart and does not allow you to select the operating system, then Windows loading was not detected.
Then, in a special terminal for scanning partitions (in Windows boot record search engines), we enter the command “sudo update-grub”, after which everything will boot.
If the situation is the opposite and Windows boots without the ability to select Ubuntu, then log in and launch the Ubuntu LiveCD terminal to download the Boot Repair utility, after which we enter the commands from Fig. 33 there:

After launch, select the first item “Recommended repair”.

And the application will ask you to enter 4 commands in the command window to fix errors and complete the process of installing new settings.
conclusions
In this article we discussed the issue of installing Linux on Windows 10 , through which you received answers to a number of questions:
How to make a breakdown, choose the right areas and brought up the issue of installation on a laptop with UEFI.
Finally, we emphasize: in order to conveniently and successfully work with Windows 10 and Linux together, you will need to stop Windows FastBoot in order to be able to launch the Windows system partition in Linux.
As a result of the installation, you have two independent operating systems and any changes in any of them will not affect the second.
And also, when reinstalling the operating system, remember that one of the disks needs to be disconnected.